How to Make Your Own DIY Sweater Pumpkins
This post contains affiliate links for which I earn a small commission at no extra cost to you, should you purchase through them. Learn More.
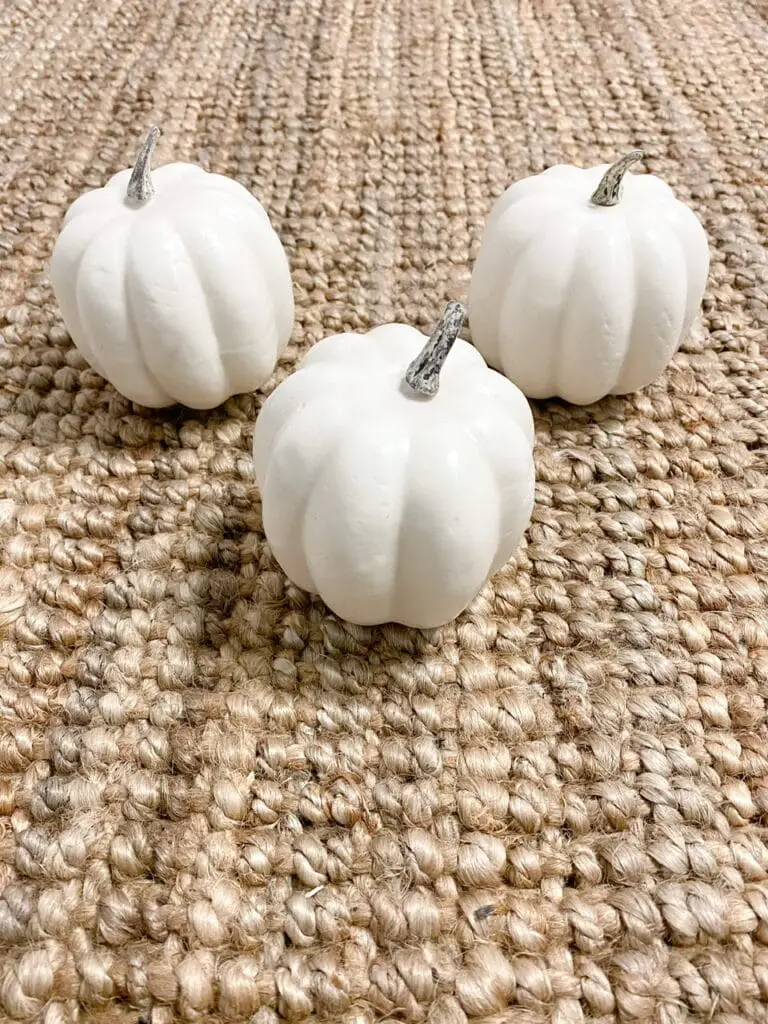
I picked up a bag of assorted sized pumpkins from Hobby Lobby that were 40% 0ff $9.99 (ended up being $5.99– so you won’t have to do the math.) Great deal! There were 7 pumpkins in the bag, 3 larger ones and 4 smaller ones. I used the larger ones for this. This set on Amazon comes with more pumpkins and is still a great deal and looks very similar to mine.
But like when I say large…they were not actually large by any means, as you can see from the photos, but they were the larger size of the 2.
Anyways.
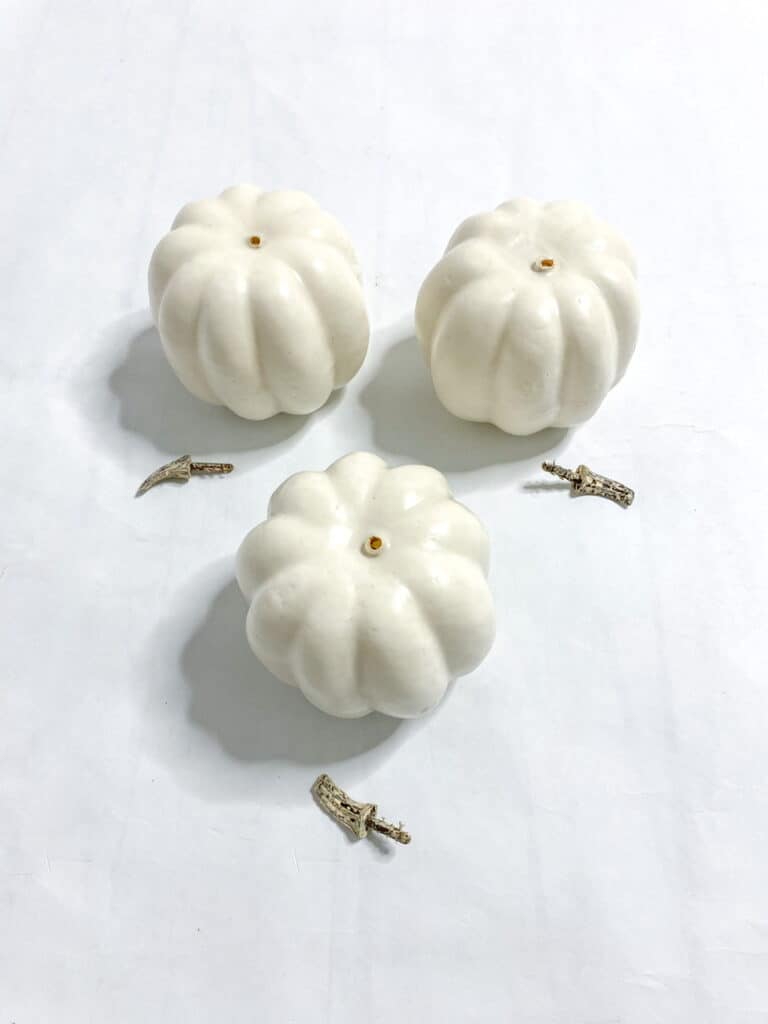
These ones were perfect because they are foam on the inside so the stems literally just popped out. If you happen to have plastic pumpkins, use a box cutter or X-ACTO knife to remove your stem. No big deal if your pumpkin is hollow inside, the sweater material will plug up the hole.
In fact, bonus if yours happens to be hollow because you can basically skip this step of carving out a hole in the top of your pumpkin(s). I will be adding a video on Instagram of my process for this (as well as the entire DIY, so if you need more visuals head over there and check it out.)
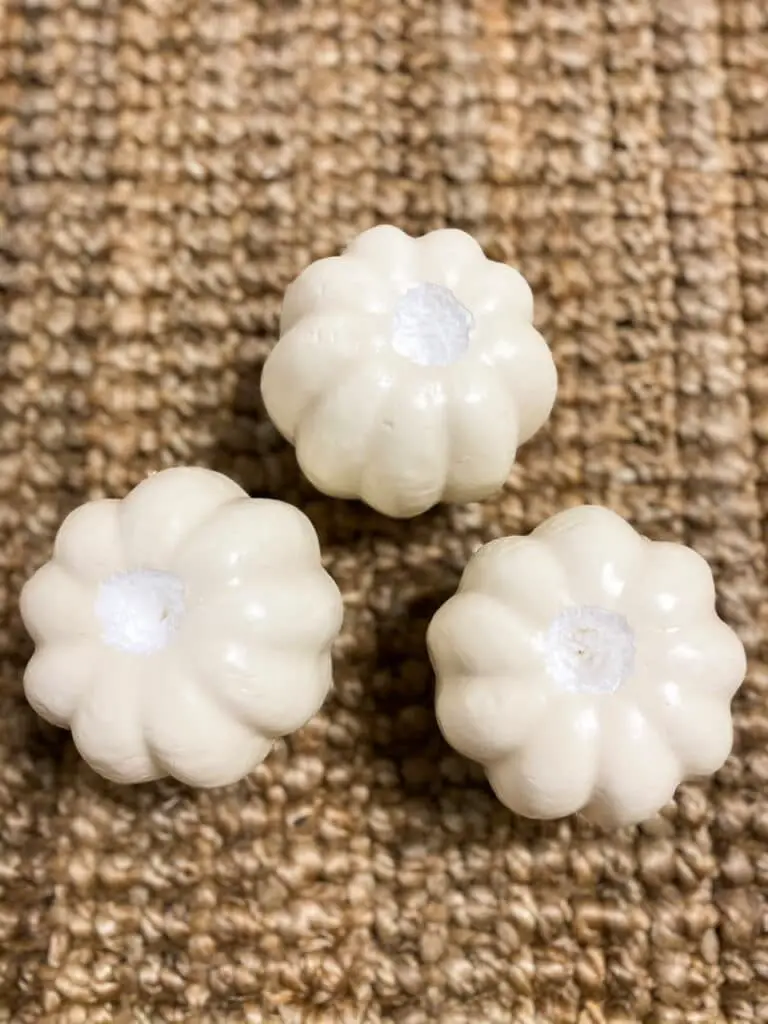
Basically I carved a hole first and then to make it bigger I just kept shaving away small layers of foam until the hole was maybe 1.5″-2″ wide (sorry, I forgot to measure exactly how big it was before I closed it up with sweater material, face palm.) Then I repeated the same steps on the other 2 pumpkins.
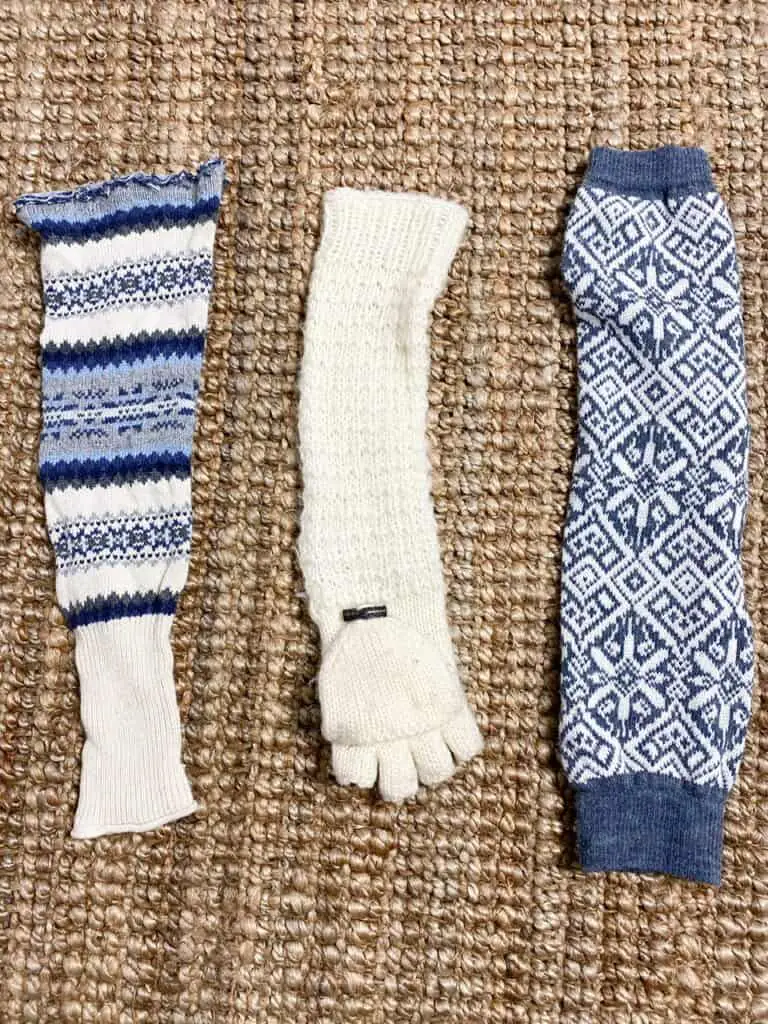
I had these old leg warmers (the one on the left was actually another DIY project I did many many years ago using the arms of a thrifted sweater to make these leg warmers, I was really into leg warmers at one point in my life, if you couldn’t tell.)
And this glove that was from a pair I never wear anymore because I had to wear another pair of gloves underneath to actually keep my hands warm. Annoying.
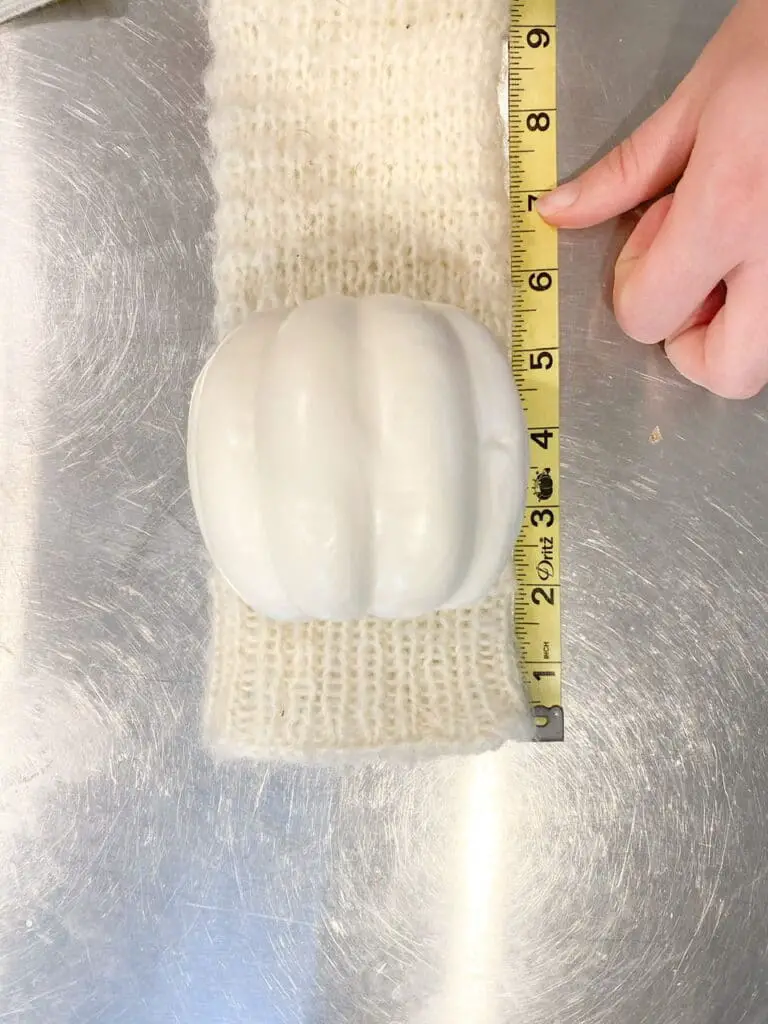
So I laid the pumpkin on the material and originally cut 2″ on top and 2″ on bottom but ended up trimming off an inch from the bottom because it was too much fabric.
(Side note… the pumpkins, see– not large, actually rather small. Just not as small as the other ones. Ok I’m done talking about the size of my pumpkins now. Promise.)
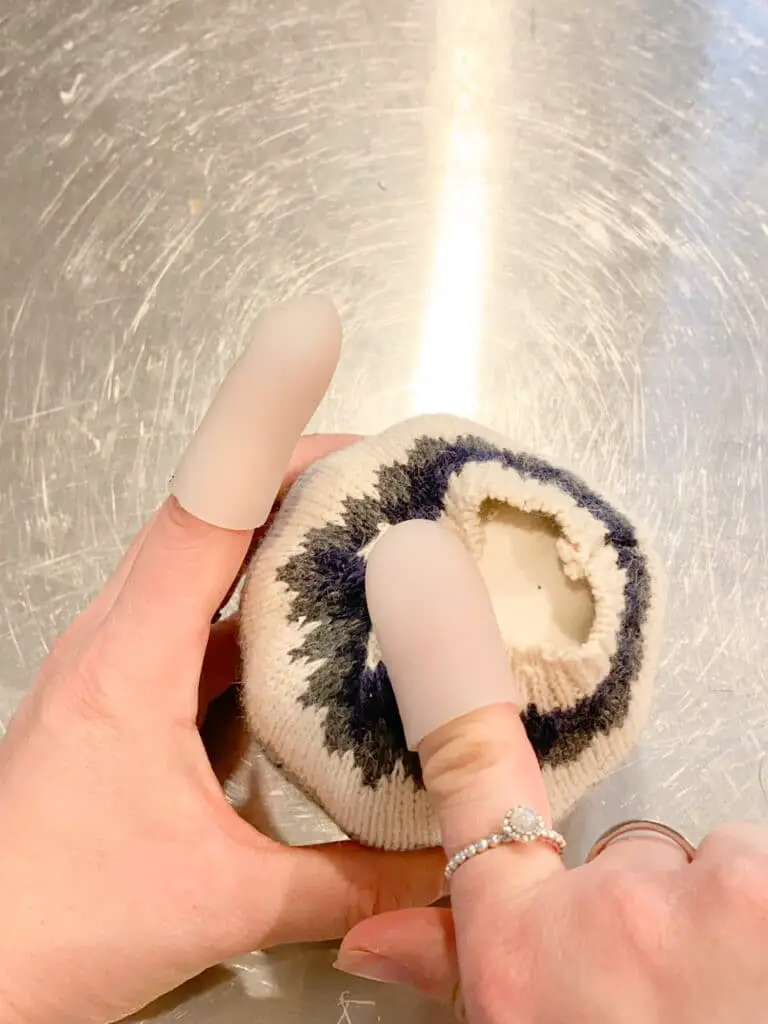
So once I had all my fabric cut I stuck the pumpkin inside and starting poking the material into the hole I carved, taking small areas of fabric at a time. It should fit pretty well inside the hole you make, otherwise you may need a slightly bigger hole. You want the fabric to fit entirely in the hole and stay put on its own. Again, repeat on any other pumpkins.
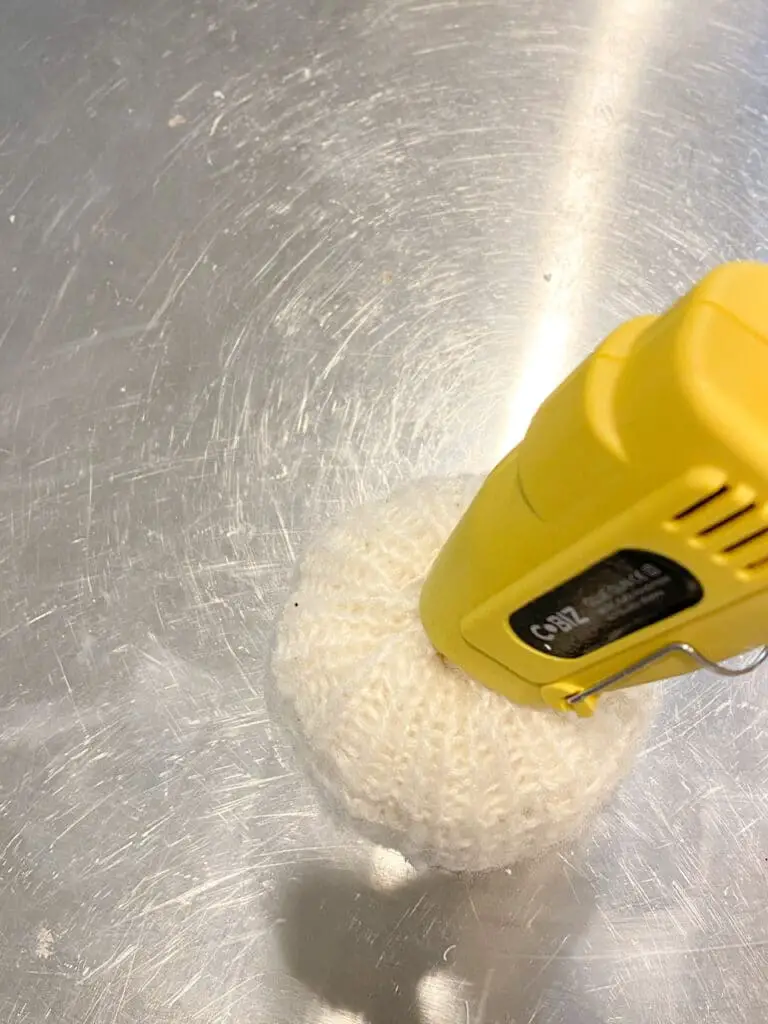
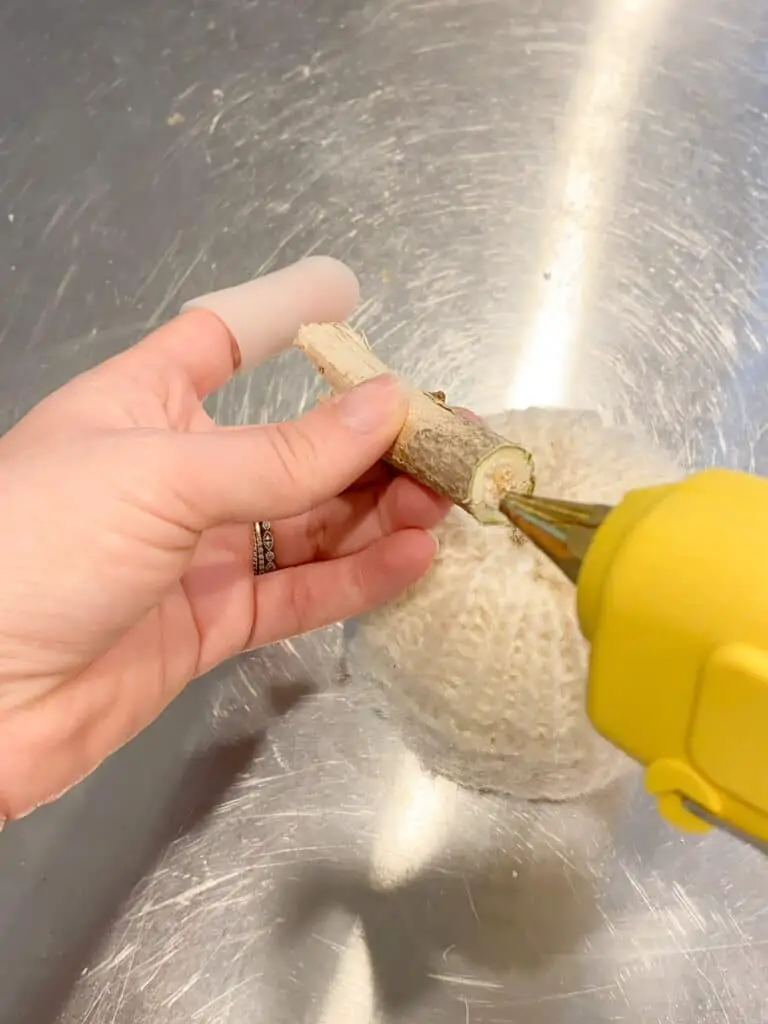
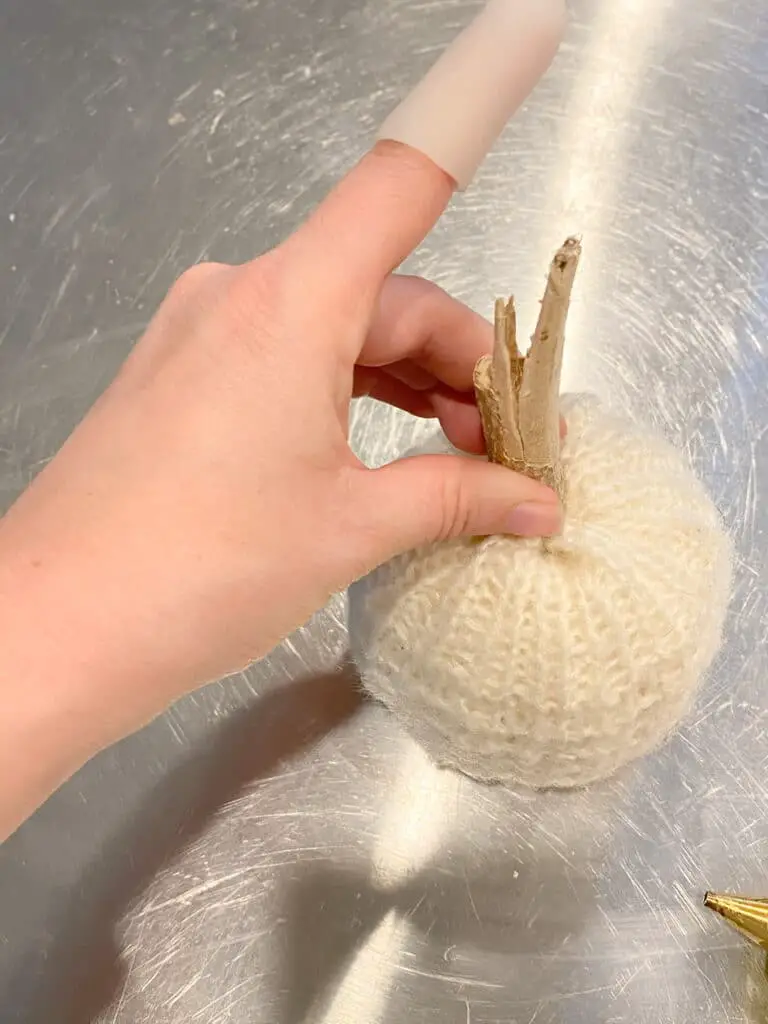
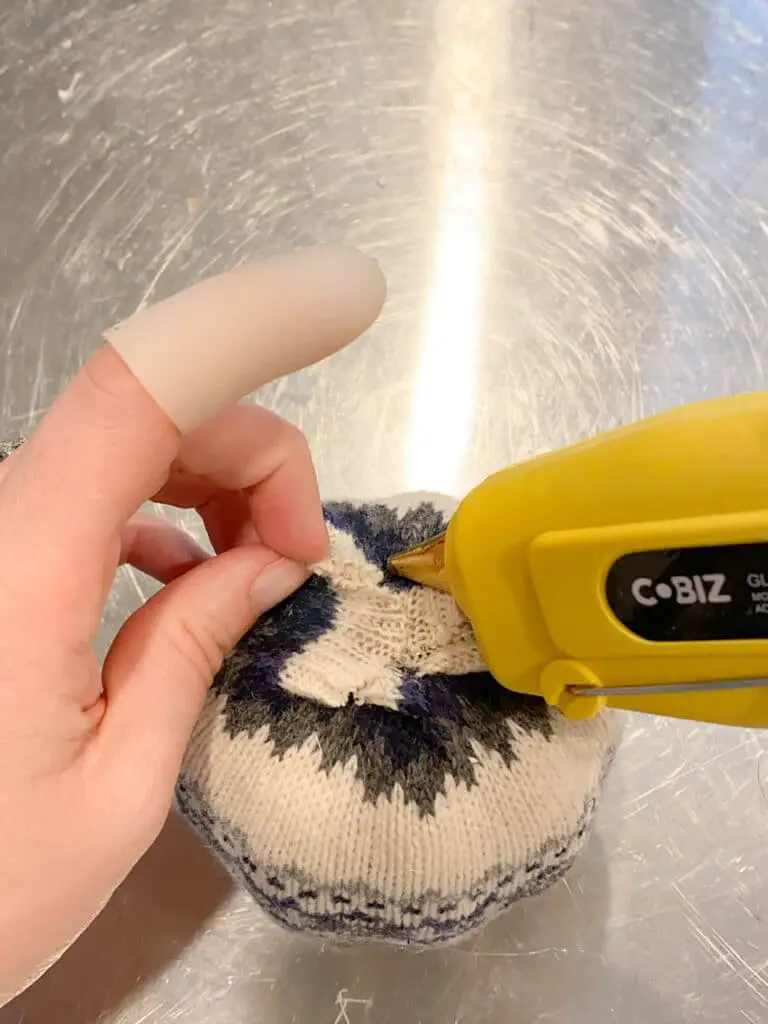
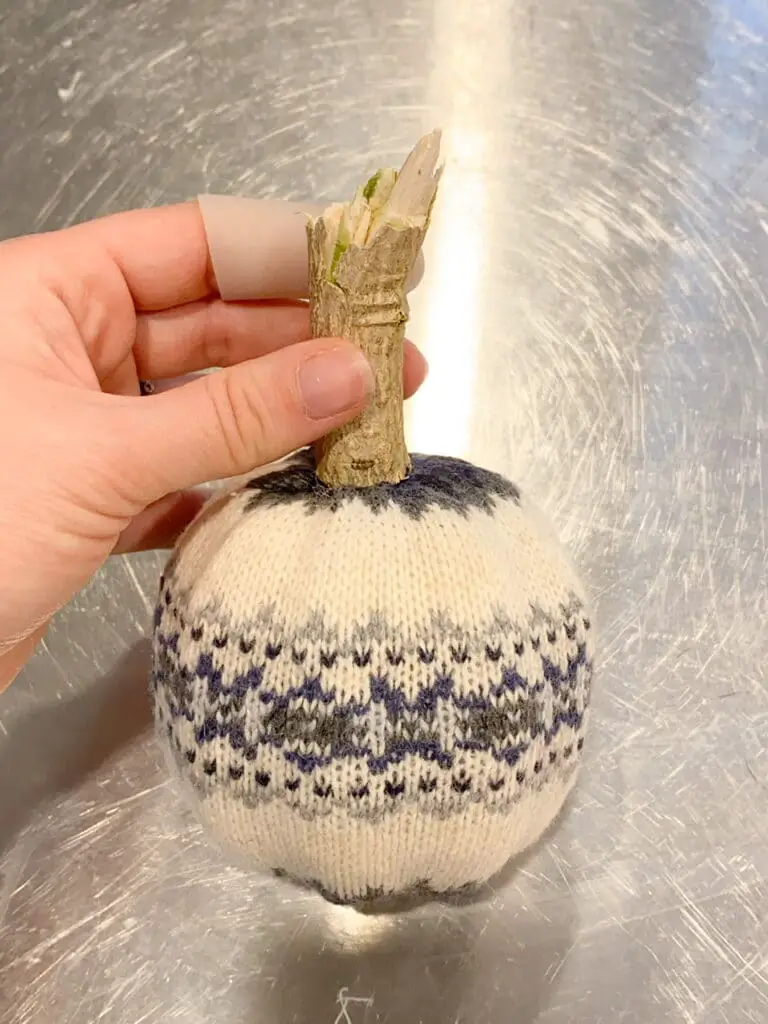
To secure the material I took my hot glue gun and stuck some glue down into the hole. And for my stem I used a stick I found outside, cut down on one end so it was flat and broken on the other end so it was split and looked a little more like a stem. I just hot glued it on top of the hole.
By doing this first, it will help keep the material in place and taut as you stretch it to close up the other end.
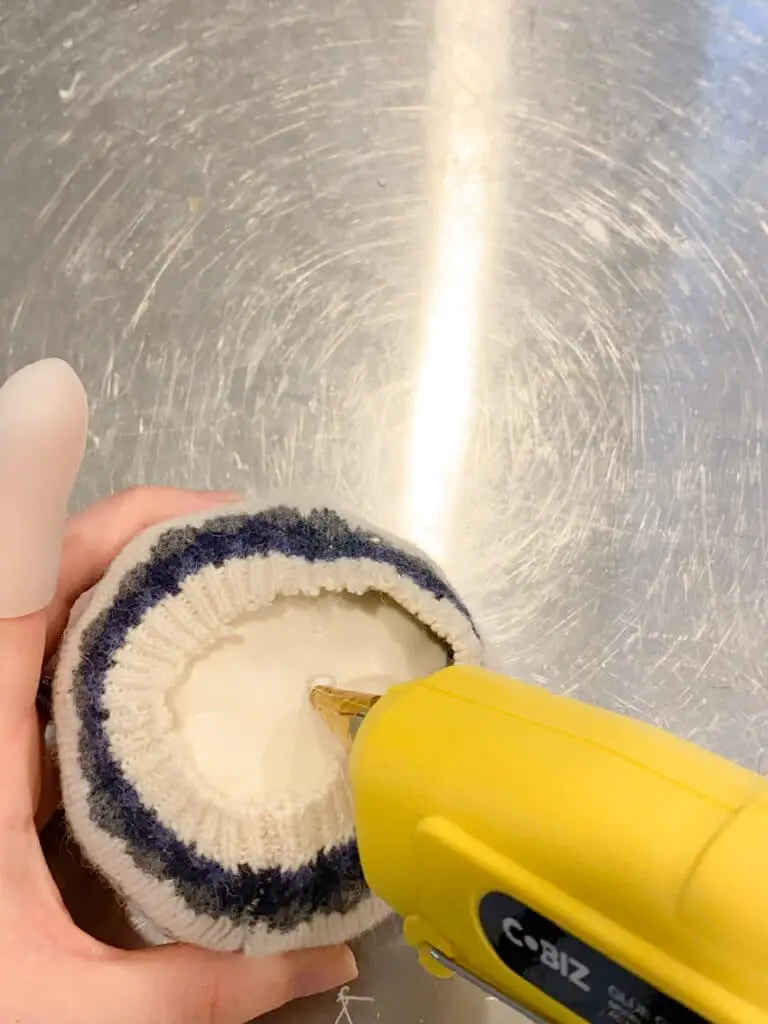
I did also try gluing the bottom of the pumpkin without having the stem on yet (see below) and found that it was kind of easier because I could set the pumpkin down while gluing. I actually had minimal material pulling loose from the hole on top.
So I might suggest trying that first and if your material is staying put then go that route instead. But if you aren’t bothered by the stem then just do it this way to make sure your fabric is as fitted to the pumpkin as possible to get that cute little pumpkin shape.
How about those finger protectors?! They come with this glue gun, and let me tell you, 100% useful.
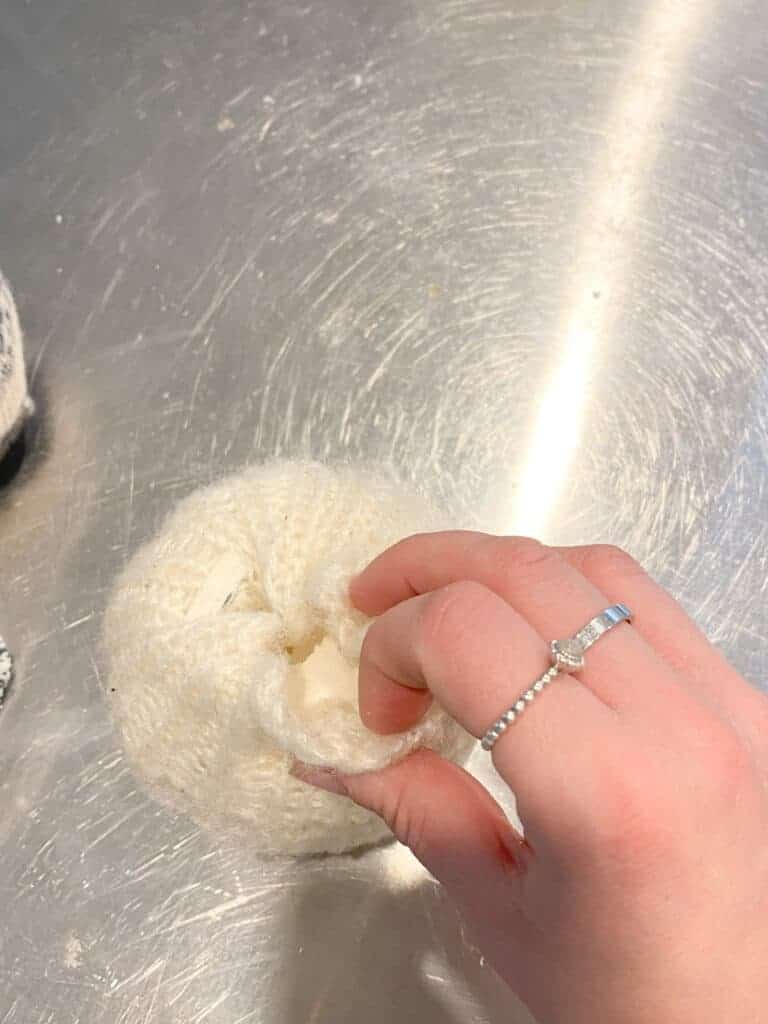
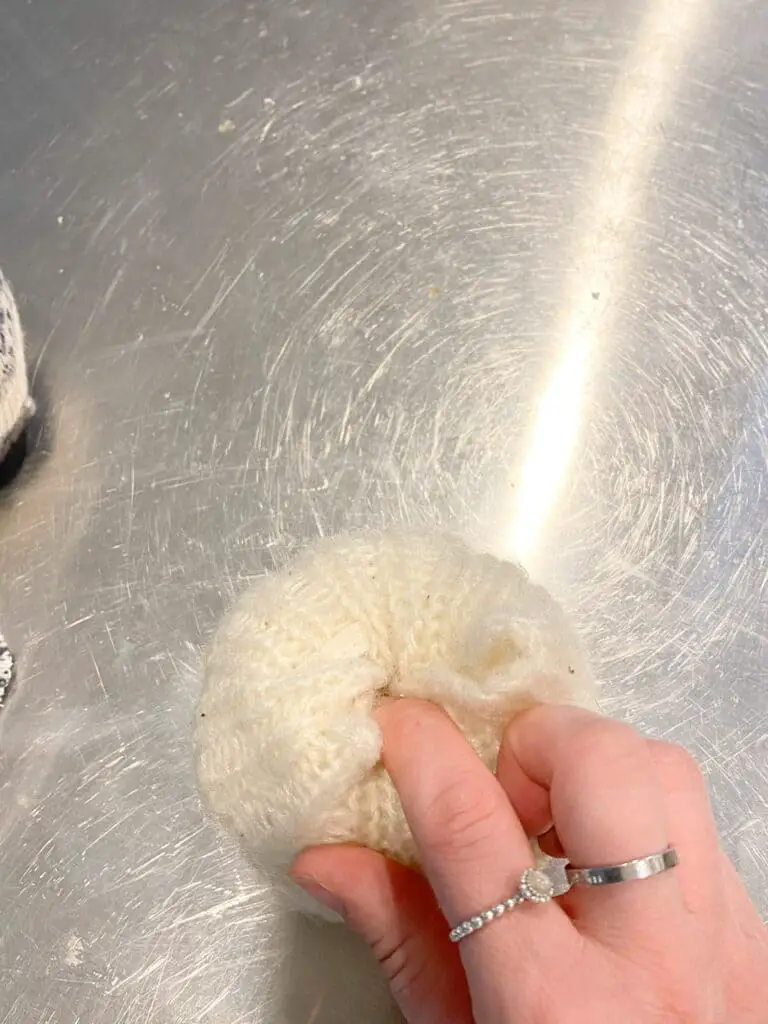
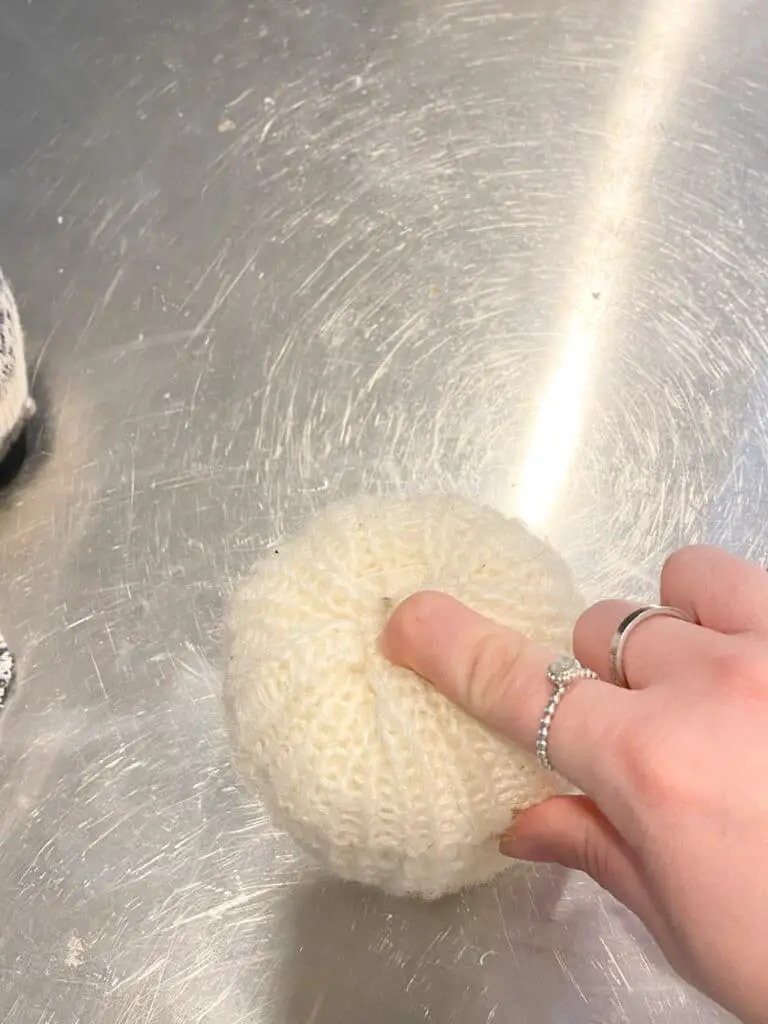
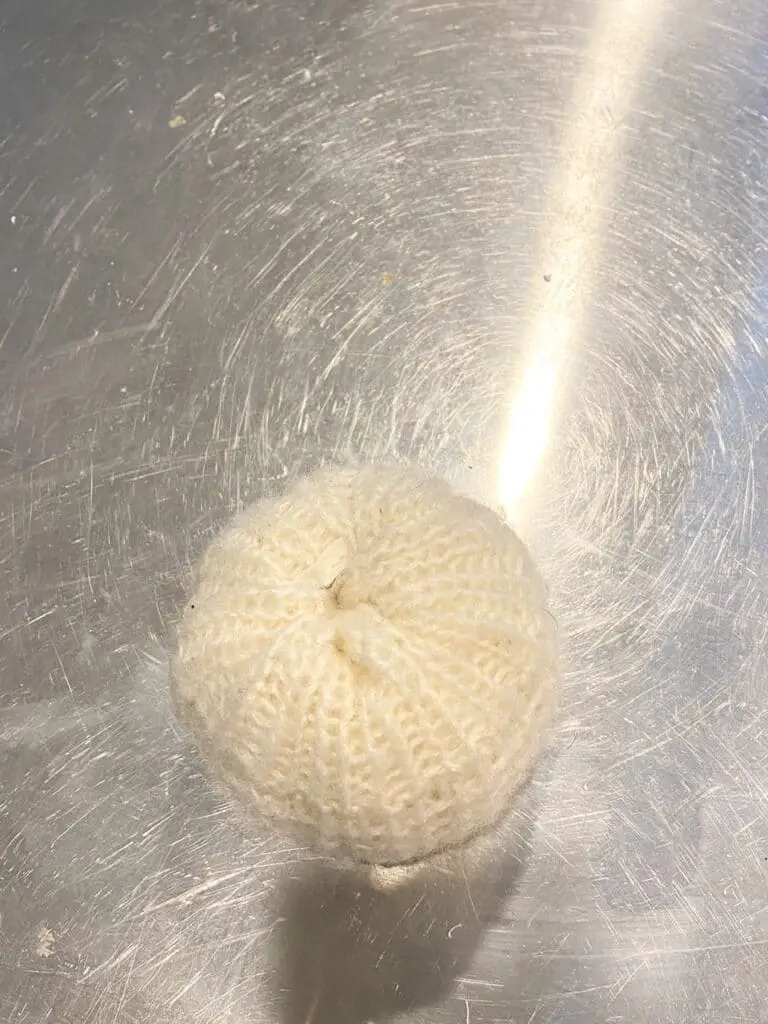
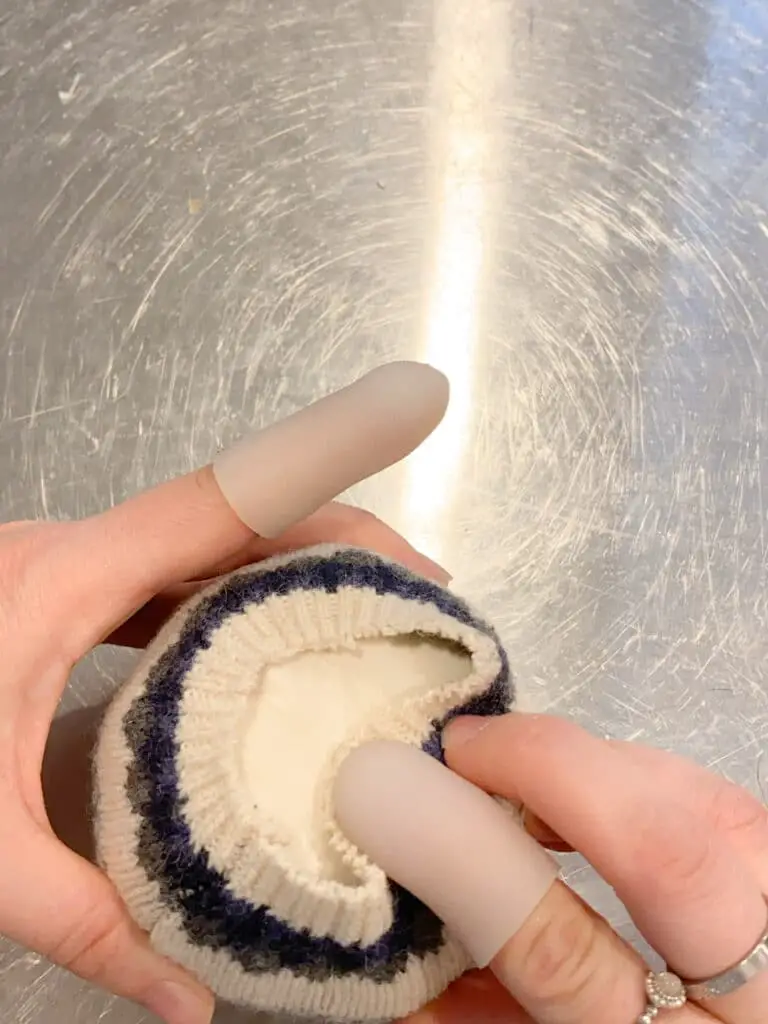
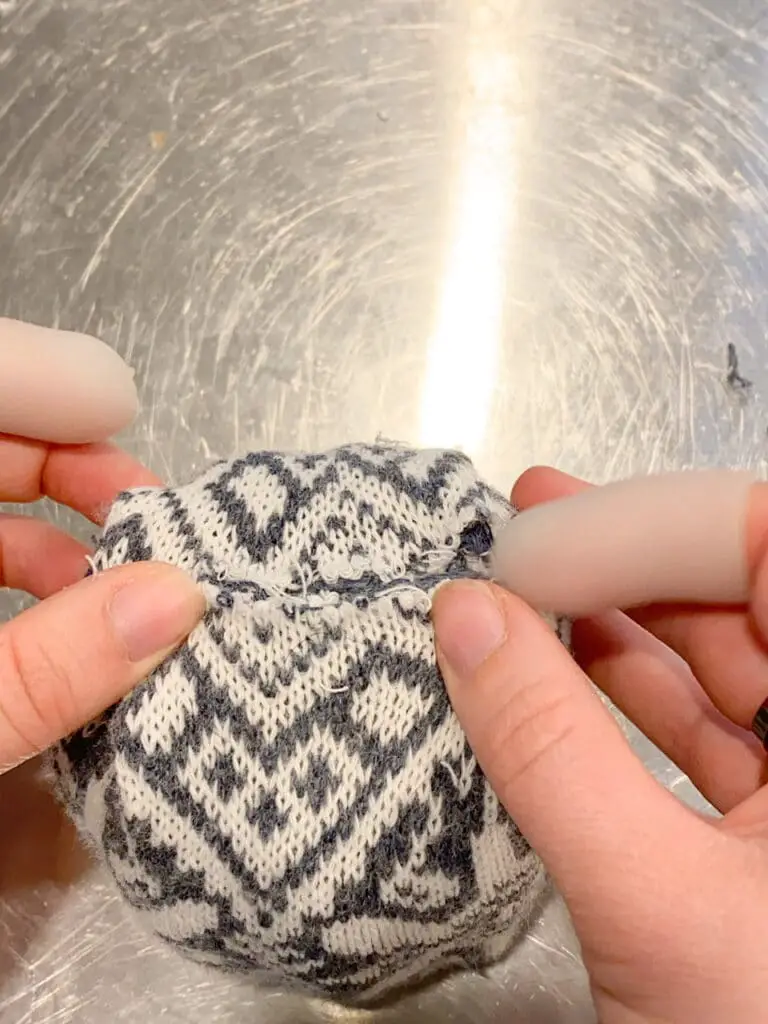
So here is what I did to glue the bottoms closed. I basically dabbed some glue and then folded the material as if I were wrapping a present. Trying to keep as flat of a surface as possible.
I experimented with folding methods and I think the most successful was folding 2 opposite sides first and then folding the other 2 opposite sides. Versus folding one side and then the side right next to it, if that makes sense. The last photo shows a good example of how I folded opposite sides to get the best flat surface. Think across from, not next to.
And in hind sight, I think another good option would be to actually carve a hole in the bottom of the pumpkin as well to tuck the fabric into so you aren’t left with quite so bulky of a surface for the pumpkin to sit on.
I did the experimenting so you wouldn’t have to. 
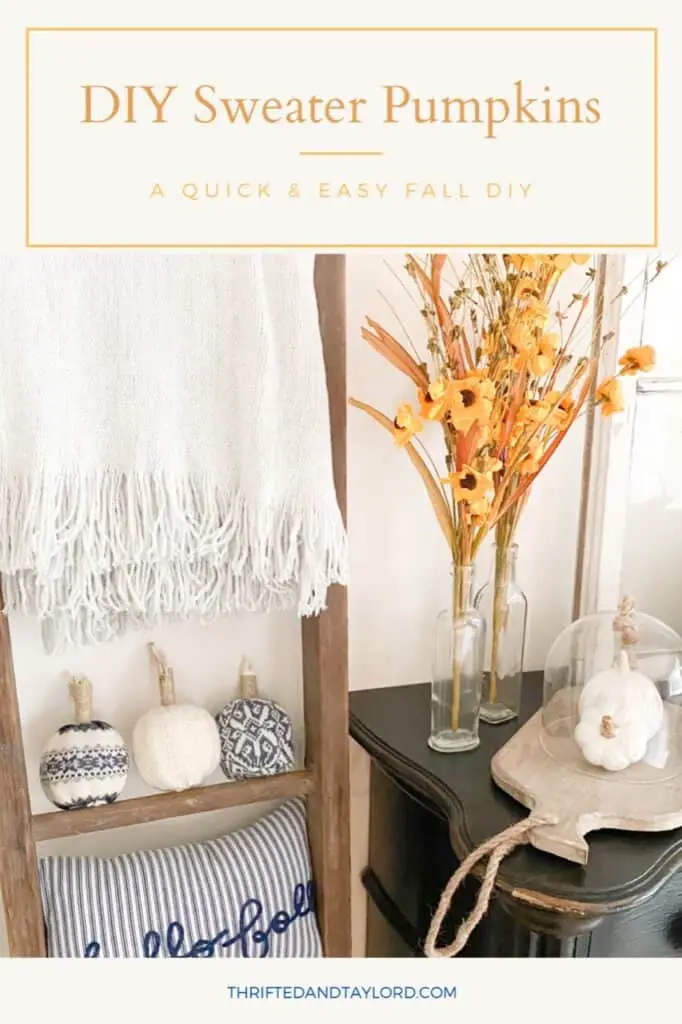
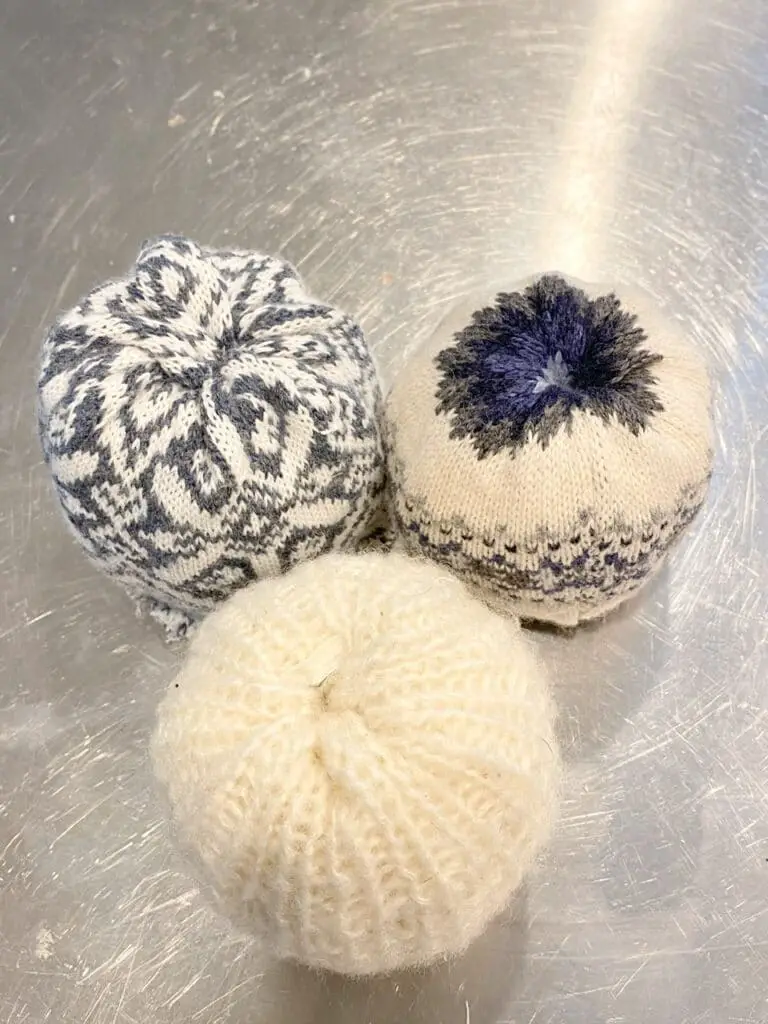
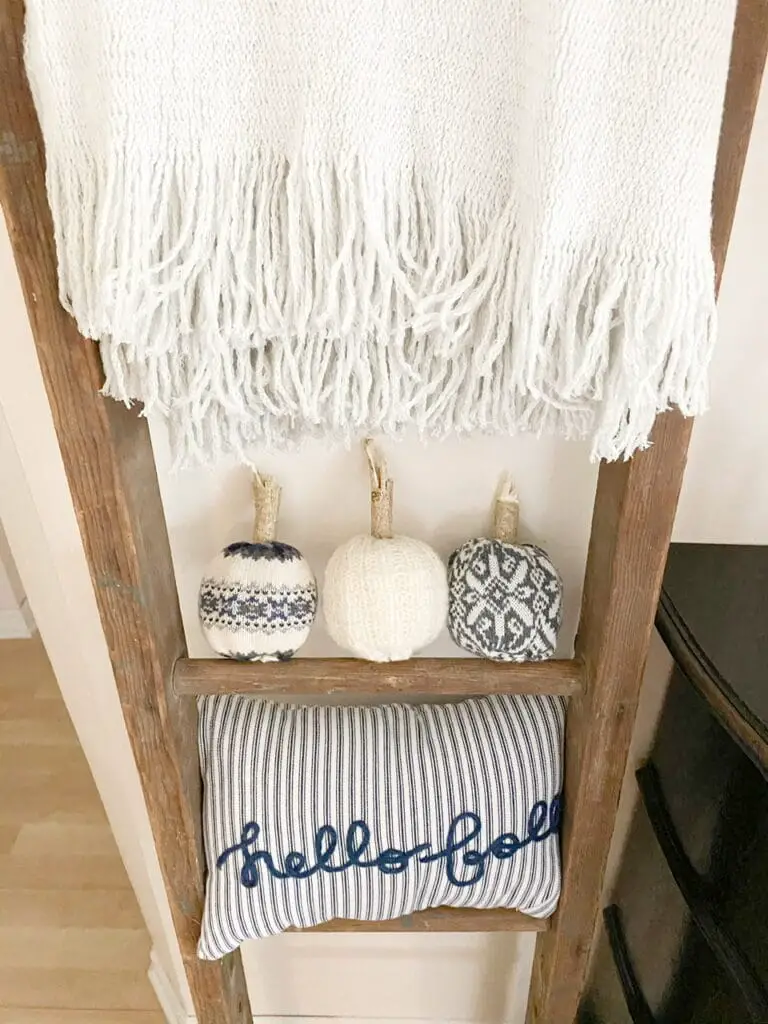
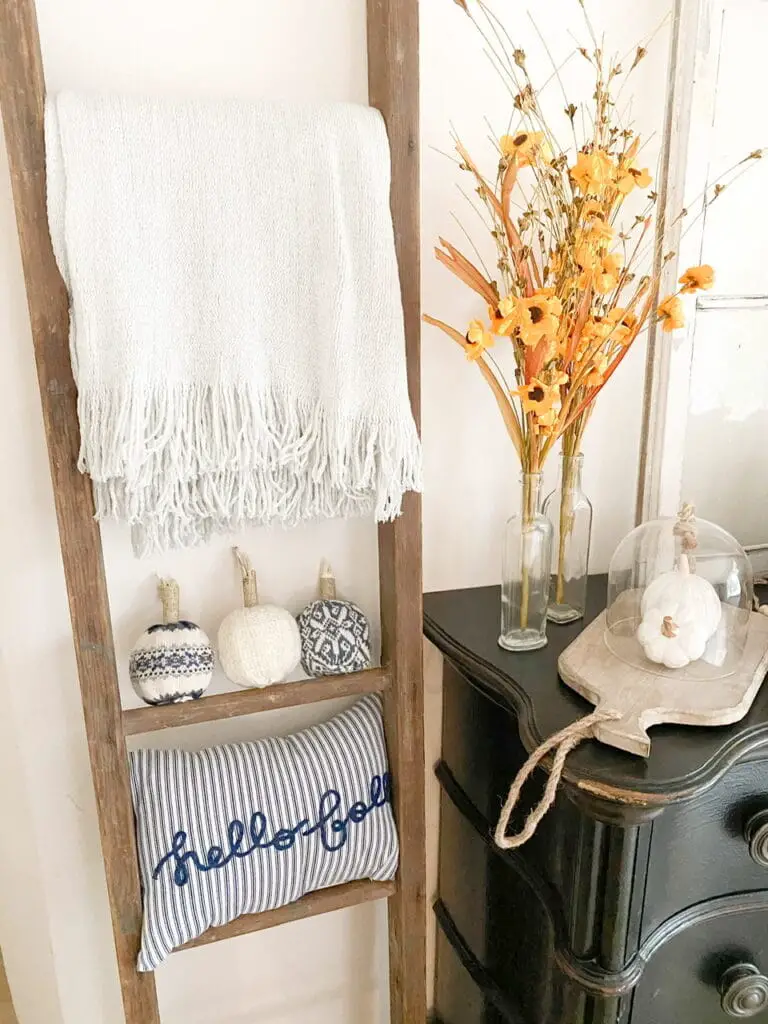
And here is the final product! These DIY sweater pumpkins turned out so cute and fit perfectly in this little spot on my antique ladder. I just love how easy it was to make them and how unique they are. I love using stuff I can find outside or around the house to make into new things.
For another really quick and easy fall DIY check out this 10 minute pumpkin stem DIY and for some thrifted fall DIYs check out this post.
What do you think about these cute little pumpkins? Something you might want to try yourself? Let me know if you do end up trying them, I’d love to see your results. Find me on social media (below) and tag me! I will see you next time.